Despite the pressing need to work with PDF content, PDF conversion, despite all its benefits, might not always be what you need. Think of those times when you need just a snippet of PDF content in a document, like when you conduct research with PDF files, for instance.
Copying and pasting on your computer is probably the first thing that comes to mind. It’s a common, yet often messy, way of getting text or images into MS Word documents quickly. However, the results you have to edit afterwards are one major reason why PDF conversion is usually the better option.
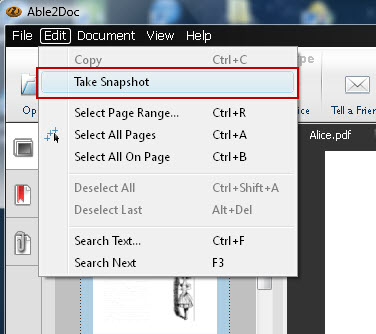
But knowing that our users may still want the option of doing so, our desktop converters include a Snapshot feature. It gives you a way to create a proper snapshot of selected PDF content. For a more detailed look, here’s a walk through on the feature and how you can take a snapshot with Able2Doc 7.0.
1. Open your PDF file in Able2Doc 7.0
2. Go to Edit> Take Snapshot. This will activate the feature and let you select a portion of the active PDF to be saved to the Clipboard as an image

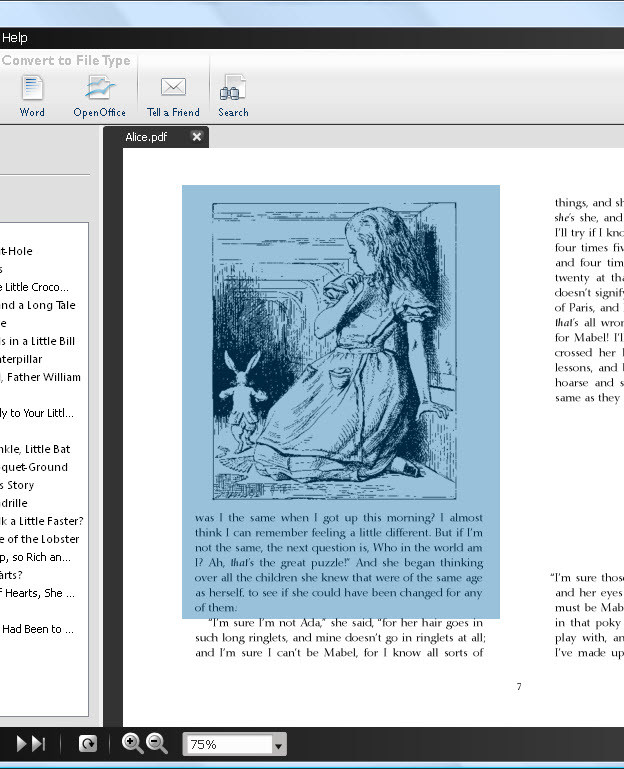
3. Using your mouse, select the image or content that you would like to save as an image, as you would normally select an area for converting PDF content

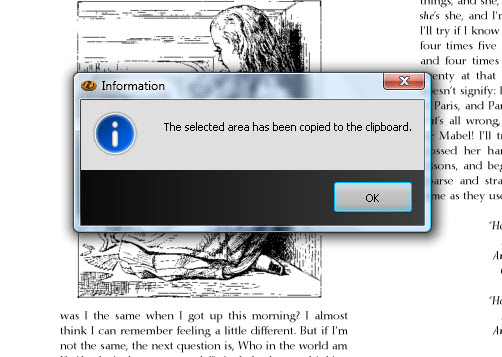
4. Once the selection has been made, you’ll get a popup letting you know that the content has been saved to the clipboard

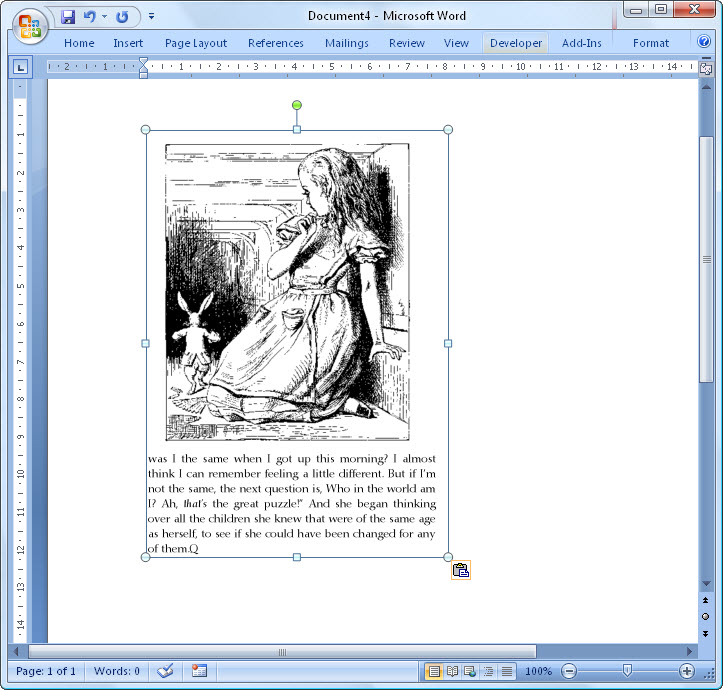
5. Go to the file or document where you need to insert the content. Then simply paste the content from your clipboard using CTRL + V or by selecting Paste from the right click context menu.

This tip is also applicable to Able2Extract PDF Converter. For scanned PDF documents, the only selection method available is area-based selection (this option enables data to be selected on a column-by-column or section-by-section basis rather than line by line).
So if you ever find yourself needing a quick image of your PDF content, the snapshot feature can get the job done easily.


