No doubt that when you create a Microsoft Word document, you have one or two tools that you always use. But if those tools span a wide range of functionality, they’ll be scattered across the ribbon, forcing you to click and toggle between tabs and bury it back into the Ribbon every time.
To solve this issue, you can customize the Quick Access Toolbar and even create a few shortcuts for your formatting functions. But why not take your productivity even further and create your own tab?
You can easily get your most commonly used functions on one single tab in Microsoft Word 2013. This way every command you need is right at your fingertips without having to go back and forth between different tabs. Here’s how.
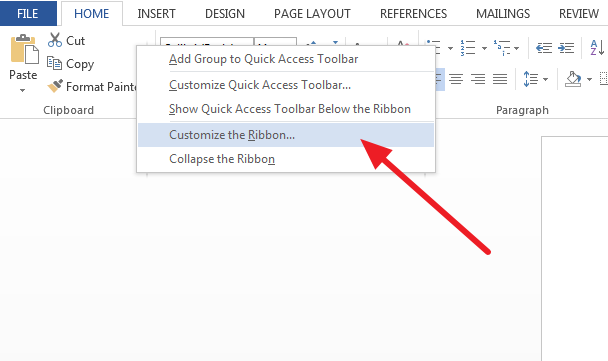
1. Right click on any tab and select Customize the Ribbon.
2. In the following dialog, click on New Tab.
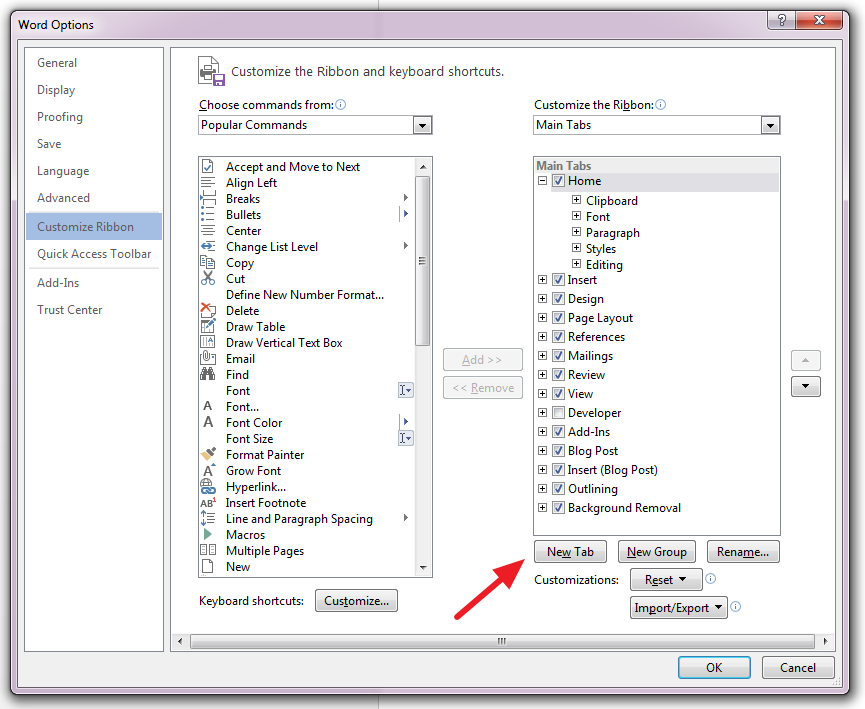
To label it, right click on it and select Rename. Click on OK
3. Next, create a group to organize your commands by functionality (eg. Formatting, Editing, etc.). To do this, click on New Group. You can rename and add icons for each group by right clicking on it and selecting Rename. Do this for each group you want on your tab.
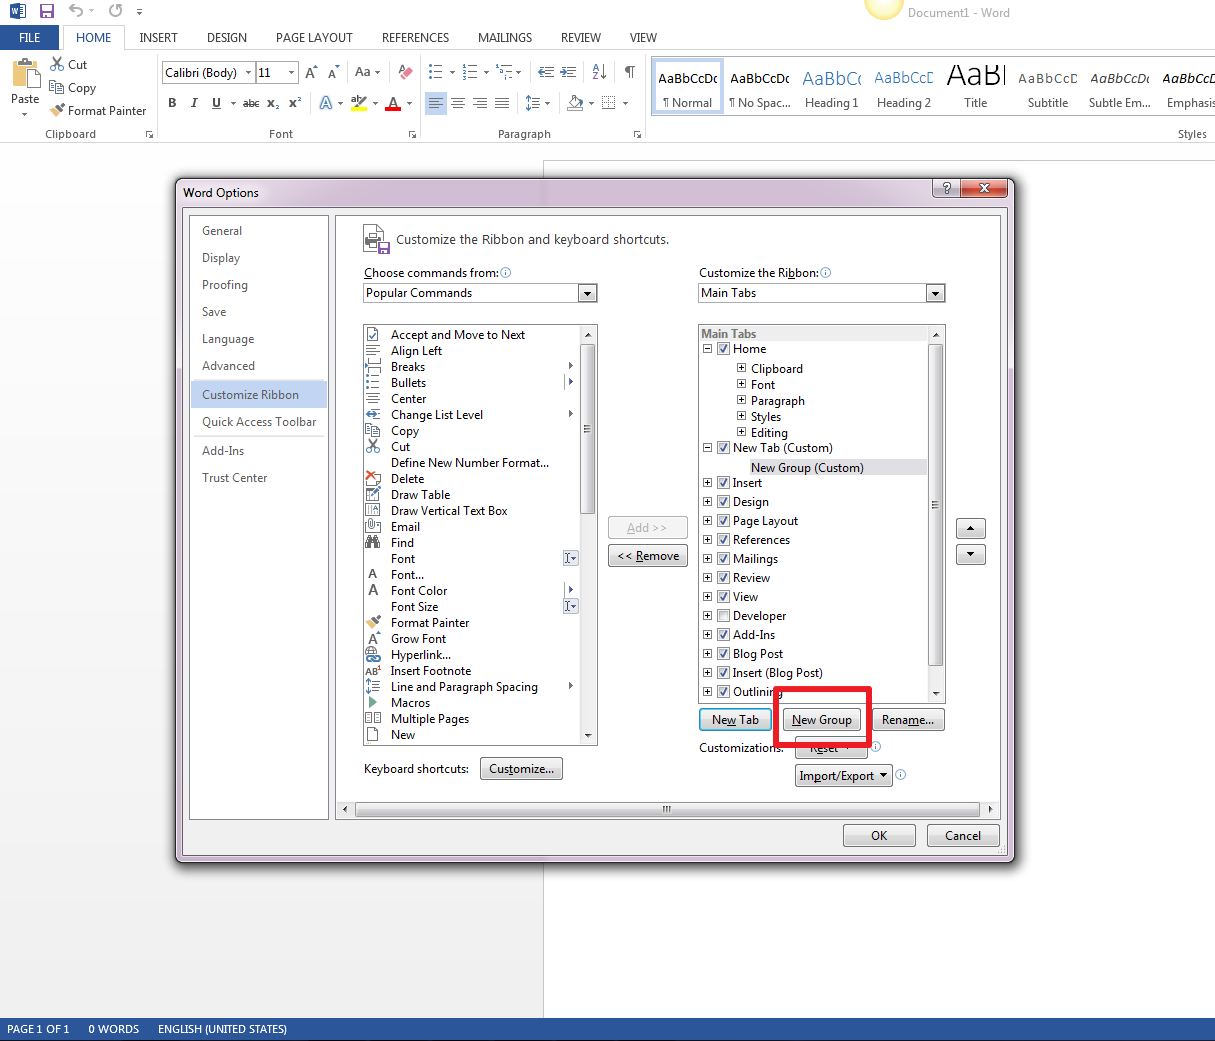
Now you can start adding commands to them.
4. To add commands to a specific group, ensure that the group is selected and highlighted. Then in the Choose Commands from column, find and select your favourite command. Click on Add. Or you can drag and drop the command directly into the group. Repeat this for every command you want to include.
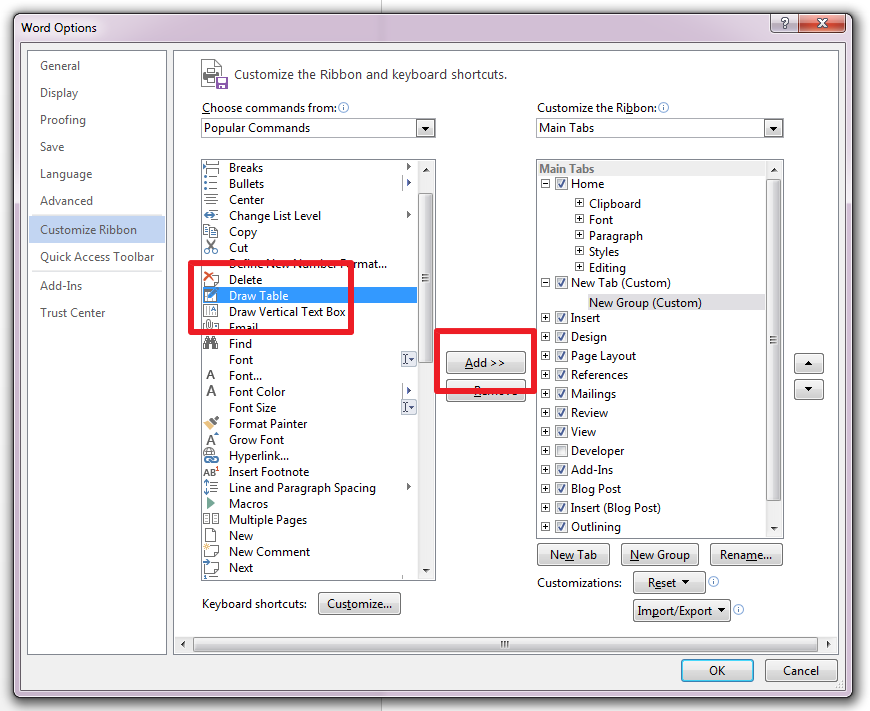
If you’d like to change the order, simply rearrange them by moving them up or down the list.
5. Click on OK when you’re finished and your customized tab will be added to the main Ribbon.
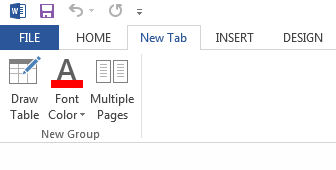
There are a number of ways to get Microsoft Word customized to your liking. Getting your very own tab set up is one of the easiest ways to do it. What other ways do you have MS Word 2013 tailored to your needs?


