In this day of DIY’ers, everyone is tech savvy enough to create and publish their own digital content, and computer software giants like Microsoft have programs that make it easy to do so.
You may have your basic applications that cover text documents (Microsoft Word), numerical data (Microsoft Excel) and presentation content (Microsoft PowerPoint).
For professional print publications, there’s Microsoft Publisher.
The application provides you with affordable and easy-to-use desktop publishing features that anyone can use. Because of this, it’s a great option for small businesses, everyday users, educators, parents or freelancers who need to design publications, but don’t have graphic design backgrounds. The application allows them to create branding and sales material that look professional.
Below we’ll give you a better idea of the application, what it does, how to work with it, and some resources to get you started.
What Is Microsoft Publisher Used For?
Microsoft Publisher lets you work as easily as you do in Microsoft Word, but instead of using tools for text, you’ll be using tools for editing page layouts and visual content.
Having said that, you may be wondering, what are the things you can do in Microsoft Publisher?
The answer: almost anything you need to professionally design and publish your material. Some examples include:
- Personalized birthday cards
- Event posters
- Newsletters for small businesses and organizations
- Professional business cards
- Flyers and programs
- Postcards and brochures
Of course, that’s just the tip of the iceberg. Editing and customizing that content is where MS Publisher really shines. You can work from scratch, from templates, or from existing content you may already have.
How To Convert PDF to PUB?
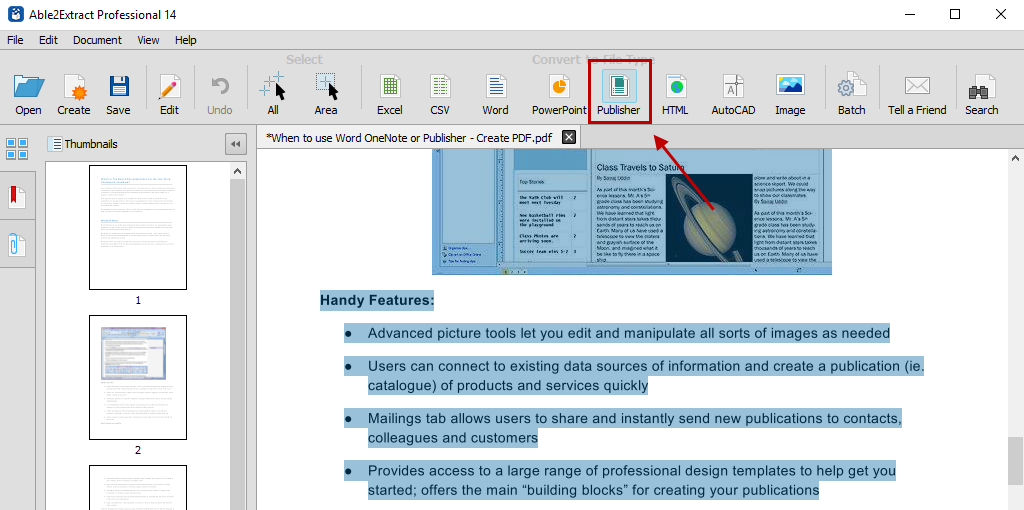
The beauty of the latter is that if you have legacy content in the PDF format which you need to use or update, you can convert PDF to PUB with Able2Extract PDF converter first.
Here’s how:
- Open your PDF in Able2Extract.
- Select the content you wish to convert.
- Click on the Convert to Publisher command on the toolbar.
- Save your new .pub file to your computer.
Microsoft Publisher Templates
On top of helping you work with your original PDF content, Microsoft Publisher also comes equipped with hundreds of premade layouts and cookie cutter templates you can use for guidance, ideas or inspiration.
To use a template in MS Publisher:
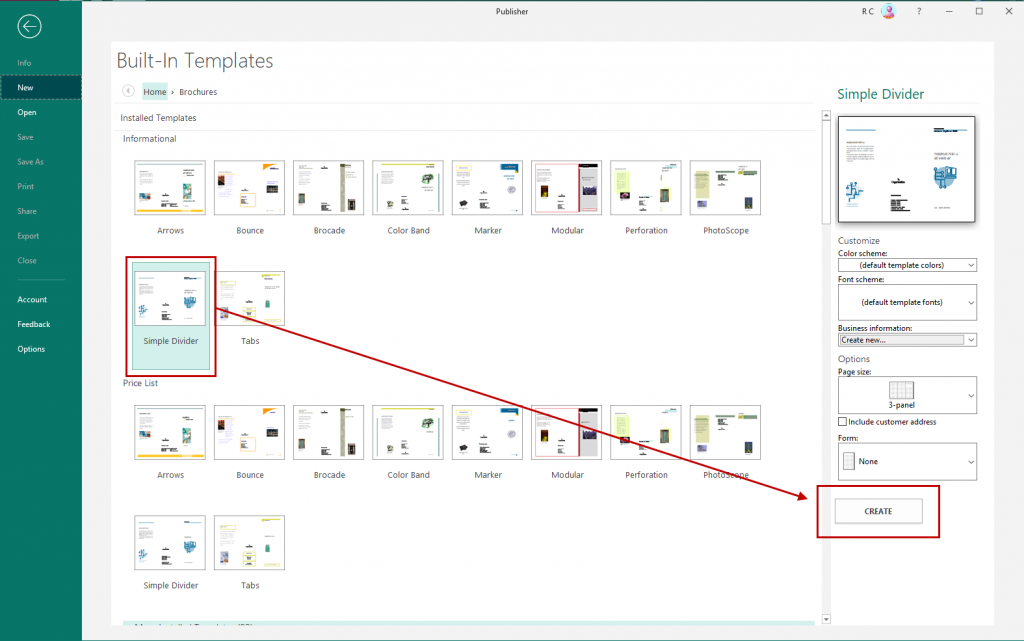
- Click on File > New.
- Then, you can either:
- Select one of the Featured templates, and click Create.
- Choose Built-in and scroll to select a category and choose a template, and click on Create to use it.
- Use the Search functionality for online templates to find the kind of template that you need.
- Once the template is open in Publisher, you can start formatting and editing it.
Getting Started With Microsoft Publisher
Before you start getting your hands dirty, there are a few basics you need to know. Because MS Publisher deals with all kinds of layouts, objects, formats and content, it doesn’t work exactly like you’re used to in MS Word. Below is a quick guide on how to go about the basic stuff.
Working with Objects
You’ll notice that in Publisher, everything will be formatted into movable “boxes”. These are known as objects, and are outlined with a border with four white circles and four white squares.
This may seem weird at first, but these frame-like boxes allow you to group, edit, manipulate and move content around on the page more easily. Here are some ways you’ll be working with objects frequently:
Adding text – To add text to your project, you work within the text boxes and can edit the text within the object directly. You can also add your own by going to the Insert tab and clicking on the Draw Text Box command, which lets you click and drag to create your own text object where you want it.
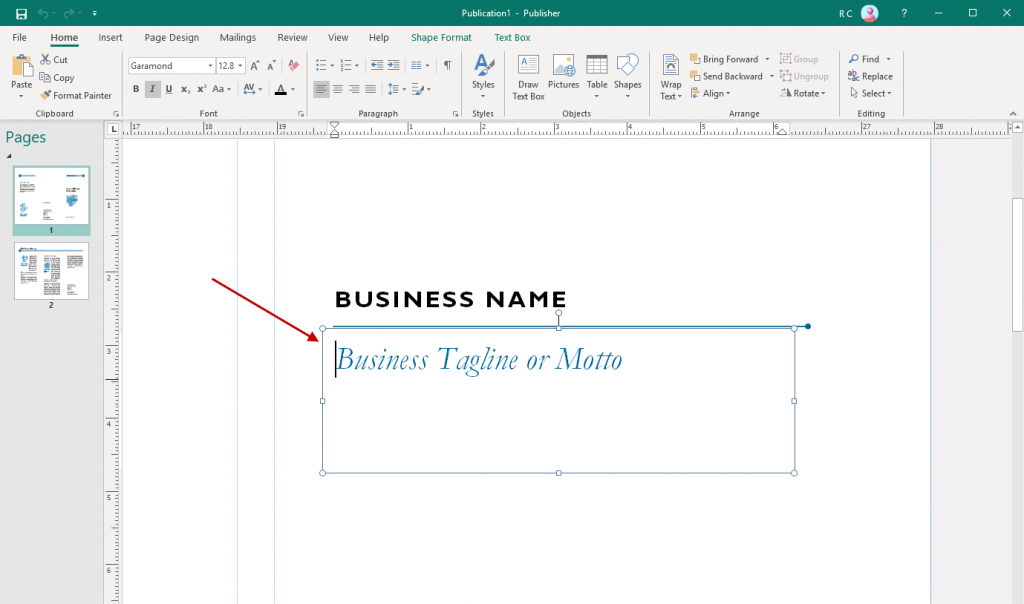
Most of the templates in Publisher will offer up pre-made boxes and objects, so getting familiar with these is necessary.
These boxes usually contain dummy text which you can easily double click and edit, customizing the font, size, and color.
Adding pictures – Adding pictures to your content is as easy as clicking on Home > Pictures. You’ll have options to insert pictures from a file, OneDrive or from a search on Bing. In addition, you have a number of options to format your picture in your publication.

Just head over to the Format tab when your picture is selected and you can start tailoring your images. To learn more about working with images, you can read Microsoft’s tips on working with images in Microsoft Publisher.
Using Building Blocks
Building blocks make it easier for you to build and customize your publication by giving you pre-made elements. You can find these under the Insert tab on the ribbon:

By exploring a few customizations, you can easily select an element you want and then click and drag to reposition and resize the element accordingly. It’s an easy way to apply and manipulate reusable pieces of content.
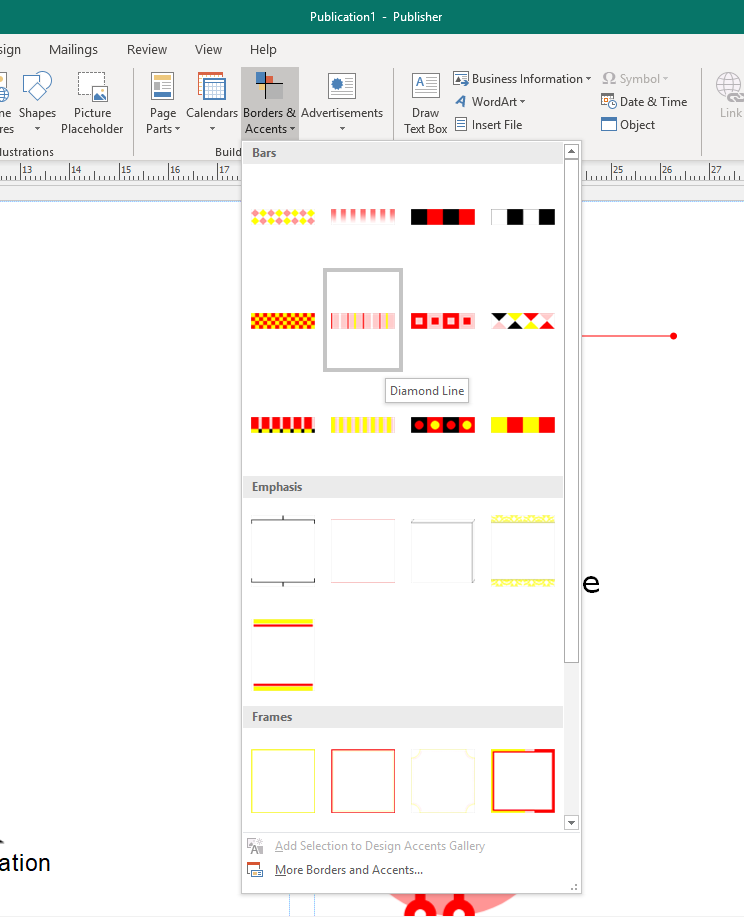
You’ll find this coming in handy when you want to add headings, borders, sections, accents, and advertisements. Microsoft Publisher has these building blocks built right in, but you can also create your own.
Using the Design Checker in Publisher
This is another feature you’ll want to use when you’re done putting your publication content together. The Design Checker is accessible via File>Info>Design Checker. It’s a tool that reviews your final content for layout or design problems and it appears on the right hand side of the interface.
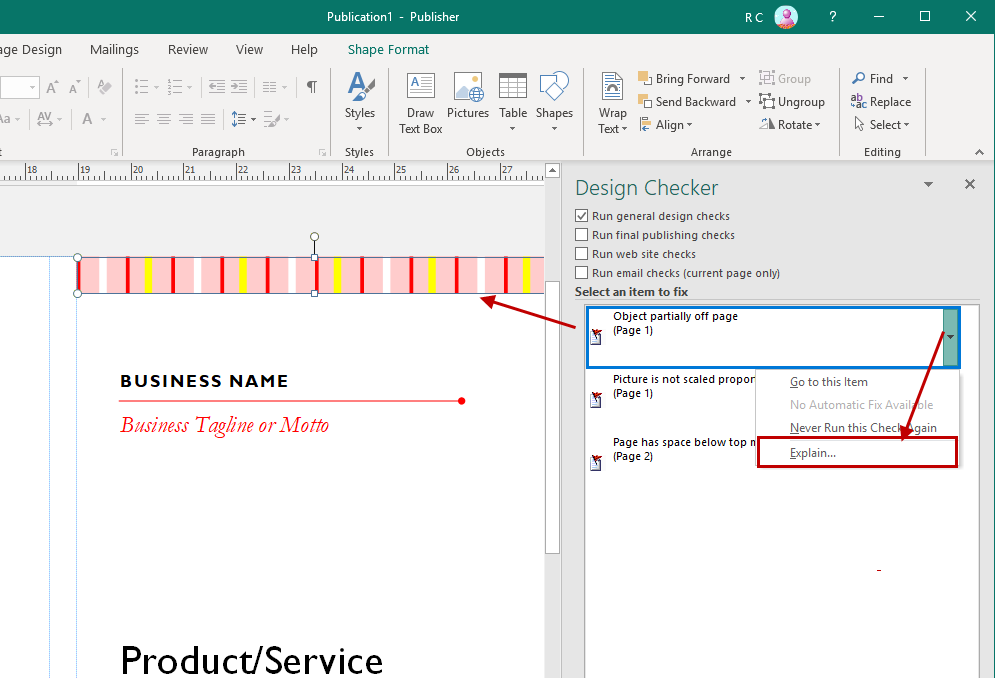
Think of this tool like your everyday spell checker, but for your publication content instead of textual typos.
The Design Checker reviews your content for a variety of design and layout problems, allowing you to catch and fix them before you finalize a print job.
And don’t worry if you aren’t a designer, the tool will provide you with explanations and suggestions on how to fix the problems it detects.
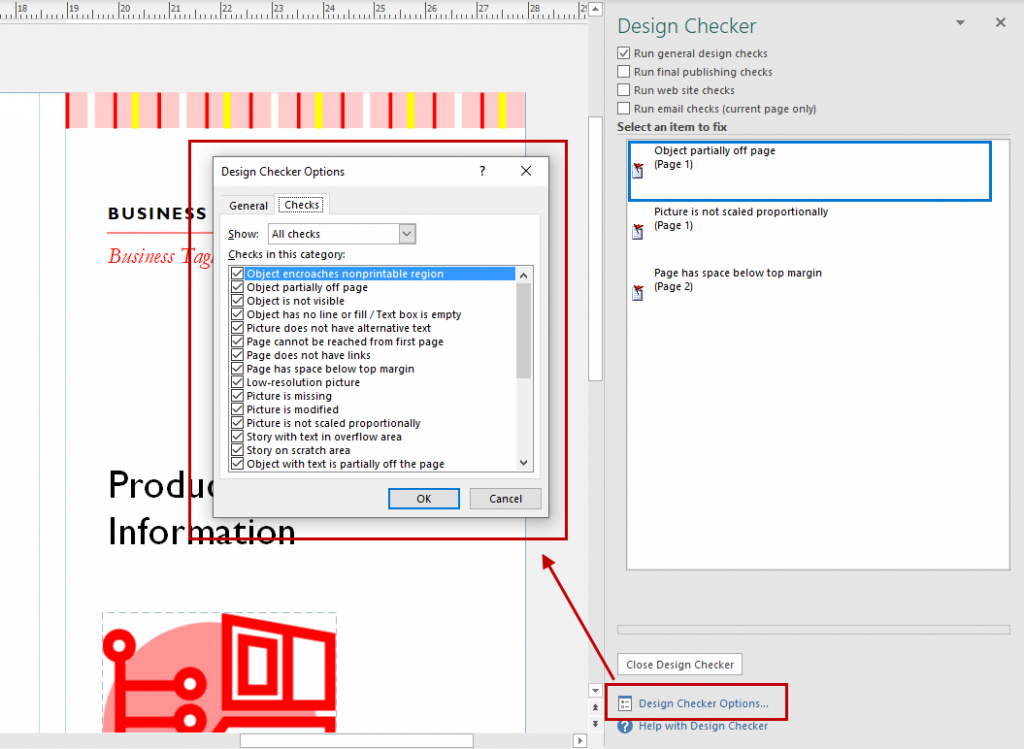
You can also specify the types of problems the tool will look for by clicking on the Design Checker Options dialog box.
Printing up your Project
As an application geared towards creating digital content meant to be printed up, this will be another basic task you’ll need to be familiar with. To print up your project, Microsoft Publisher has a few methods to help print your content.
There’s the standard method that uses the Printer functionality which you’re familiar with if you’re printing a publication on your desktop printer. The only thing you’ll need to do is ensure that you have the settings adjusted to print your content correctly on the size and type of paper you need. Do remember to save your project first, though, before you print!
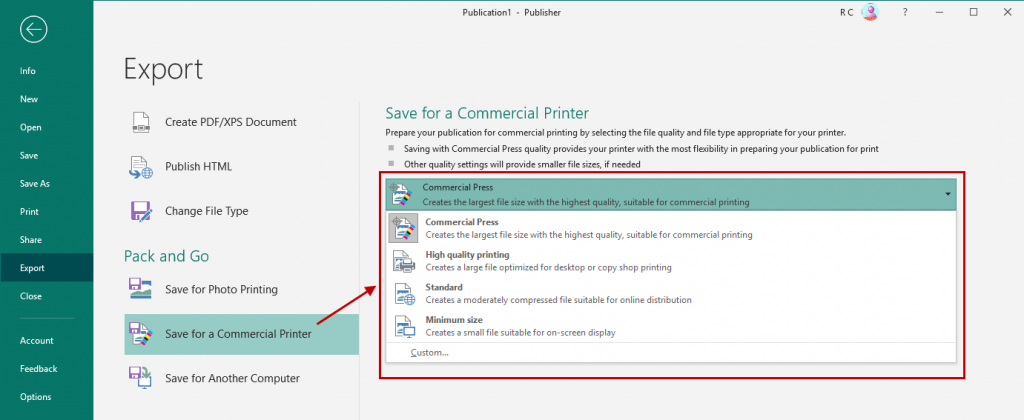
In addition to your usual PDF and common file types, there is also the Pack and Go Wizard via File>Export>Pack and Go.
This method will give you options on how to save your file for different printing purposes – even for a commercial printer – so you don’t have to worry about the technical details of formatting and settings. The Wizard will do that for you. You simply decide which option is best for your needs:
Knowing how to work your way around with the above basics will let you work easily with any type of layout or project you’re working on.
Microsoft Publisher Tutorials
Now that you know a bit more about how Microsoft Publisher works, it’s time to try your hand at it. In addition to some templates, we collected a few Microsoft Publisher tutorials to help you quickly get started:
- How to create a newsletter
- How to make greeting cards and invitations
- How to make a two-column publication
- How to create an organization chart
So, armed with the basics, you’re now ready to start creating professional looking content for publishing without the hefty price tag.
Let us know in the comments what other questions you have for working with your digital content and how MS Publisher worked for you.


