Last week, we gave you a couple of tips on how to incorporate a few of our tools into your daily study grind. Those were tools you could seamlessly fit into your existing list of handy resources to help you get your work done.
But for the most part, as a student, you’ll be using digital documents as a major resource that can, indeed, make your school work (and learning) much easier. Yet, the only real problem is getting those digital documents to suit your needs. As they are, they may be difficult to use.
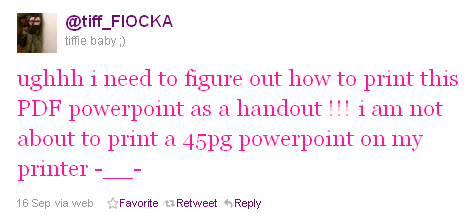
In fact, one tweeter had this exact problem:

Students are no stranger to PDF PowerPoint notes from a professor, nor are they strangers to the obstacles they pose. Luckily, Sonic is up for tackling such a task.
Sonic PDF Creator has a feature that lets you combine those multiple PDF pages onto a single page for quick overviews that are perfect when it comes to group studying, delivering presentations, or providing more compact resources.
If you’re unsure of how to get started, here’s a look at the handout creation options in Sonic that will let you format your PDF content into a handout.
1. Open your PDF file in Sonic PDF Creator
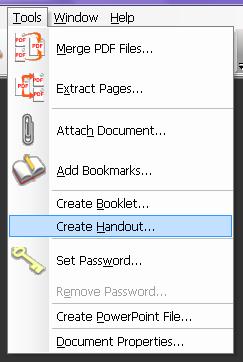
2. Go to Tools > Create Handout . . . . You’ll be given the n-Up Pages dialogue box where you can then customize and create your own handout.

3. Select the paper size of the handout

The very first thing to consider is the paper size and the orientation. Each PDF is different and no single handout formatting is a one-size-fits-all deal. Deciding which one is right for your content is easy.
From the drop down boxes you can choose from a wide range of paper sizes for your printed handout (including popular sizes: A4, Legal, 11×17, etc.). Then designate whether your pages will be in portrait, landscape, or Auto (according to custom width and height, which you can set manually).
4. Set the scale for your handout pages

When dealing with scaling options, you get to assign how those PDF pages will fit onto the page of your printed handout, whether letter size, legal, or 11×7.
The Auto feature lets Sonic calculate how to fit those PDF pages according to the paper size you selected. If you’d like to use the original size of the page, select Use Original Size. Or if you’d like to set the scale of your PDF content yourself, you can easily designate the width and height yourself.
With the Proportionally box checked, your destination area on the handout will remain proportional to the original page size.
5. Decide on the layout

Now that you have the content scaled down to the paper size and orientation you’ve selected, you get to decide the layout of that content.
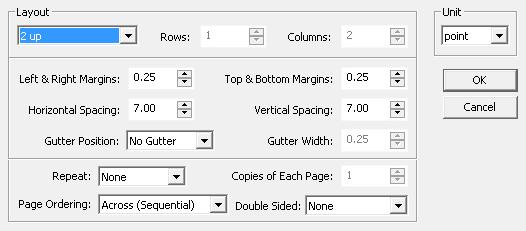
When creating your layout first make sure you decide on the measurement unit (point, inch, or mm) you need Sonic to use in order to accurately space the content for your handout.
For the layout, you can designate a different number of PDF pages per column and row along with the margin spacing around them. The gutter measurements (in case you need to bind the handout) can easily be customized to any length you wish.
You can then designate how many pages you want repeated in the hand out and the order of the pages. Note that if the pages of your original PDF content are numbered, depending on your column/row layout and if you want double sided pages, you may want to carefully plan out how your pages can be effectively ordered.
When deciding on the order of the pages, you have 3 options:
Across: Runs from left to right, then top to bottom.
Down: Runs from top to bottom, then left to right.
Stack: Runs from top left of each page, then to right, then to next row.
6. Draw crop marks on your handout pages

Crop marks can also be drawn onto the handout. You can choose from drawing crops in the corners, center, or both (with the Draw Crop Marks option). After you decide which crop marks you want, you can adjust and customize them manually.
7. Allow for bleed allowance

For handouts that will need cutting, the Bleed Allowance options will let you specify your own measurements to allow for any deviations in cutting the paper to the finished page size.
You can choose from :
None: No bleed allowance.
From original PDF: Use the bleed information from the original PDF file.
Specified: User specify the bleed allowance amounts.
8. Once all your settings in place, click on OK . Sonic will generate a preview of the new handout for you.
9. If all looks okay, you can then save it using the Save or Save As options under the File menu, and then print it out.
If you created a handout with Sonic PDF Creator before, which creation options did you use to make your PDF content look like a professional handout?


