Instagram selfies are all the rage these days. The app has helped users (and celebrities) produce some of the most widely shared pictures on the web.
Who doesn’t like to take a fun pic when they’re out and about or when a memorable family moment crops up?
Yet for some, Instagram is a professional tool. From graphic designers and photographers to online entrepreneurs and real estate agents, Instagram is an extremely effective platform for marketing and spreading the word visually about what they have to offer.
Whether you have photos of your workspace, products or digital work, a PDF portfolio of your best Instagram shots is a super easy way to enhance your professional pitch and drum up some business. Here’s how.
1. Download Instagram Photos With DInstagram
The first thing to do is download your Instagram photos. DInstagram is a Chrome extension that allows you to download individual Instagram photos. To do this:
a) Install the extension on Chrome.
b) Log into your Instagram account (this will also work if you aren’t logged in and are viewing your account’s photos, too).
c) Click on the photo you want to download.
d) In the upper right hand corner, click on the DInstagram Select your format (choose either PNG or JPG). Select the image size (Big, Medium, Small). Click on Download.
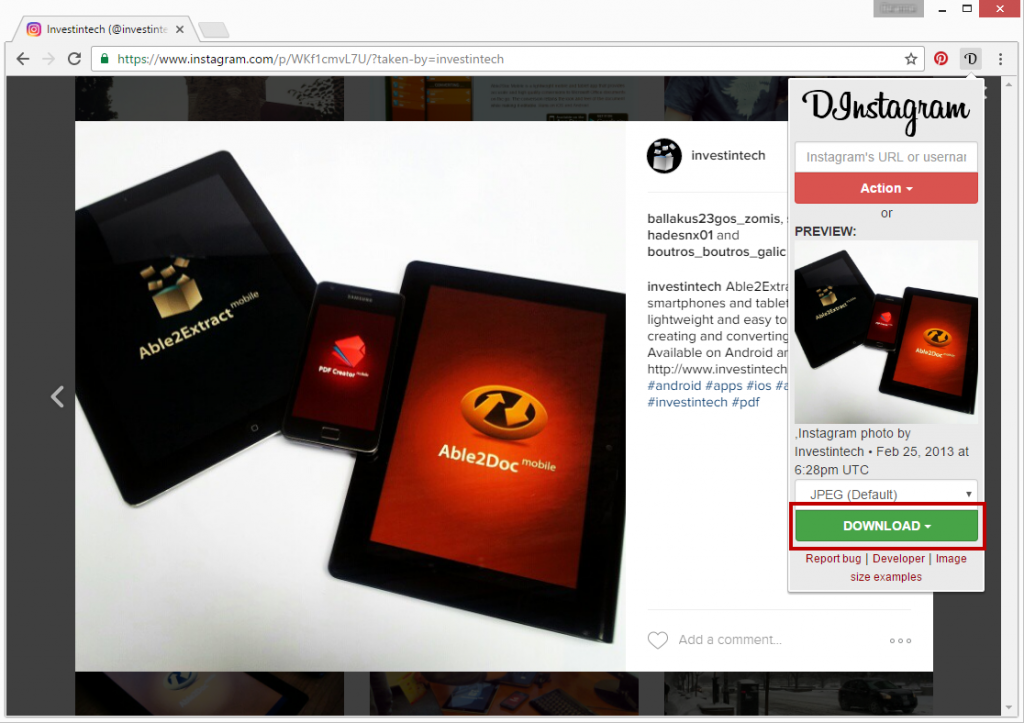
e) Save the photos onto your computer. Tip: create a new single folder for all your photos for easy access.
2. Convert Your Instagram Photos To PDF
The next step is actually getting those photos into the PDF format. This is where Able2Extract 10 comes in handy.
a) Open Able2Extract 10.
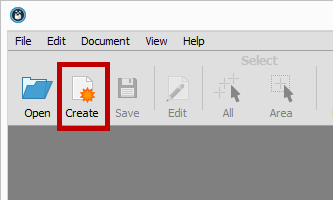
b) Click on the Create icon in the toolbar.
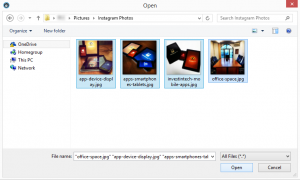
c) Select your image files. Able2Extract 10 will let you quickly open a number of images simultaneously just by selecting multiple files at once. Click on Open.
d) In each tab, click on Save.
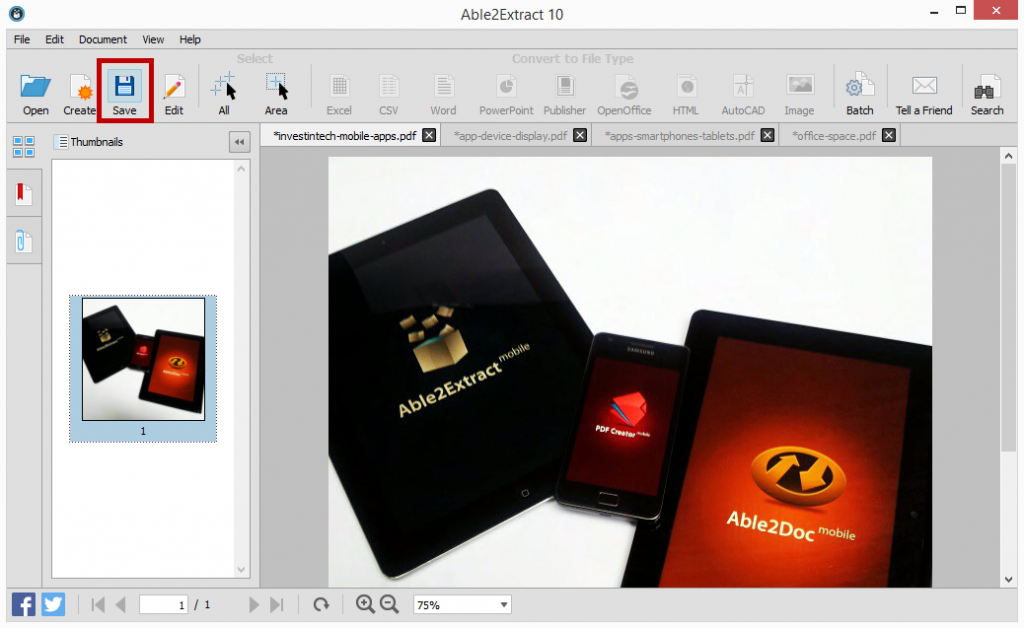
Tip: Just as you did previously, create a new folder for all the PDFs you will be creating. This will give you a place to export any other future Instagram shots in PDF you may want to include when you update your portfolio.
3. Merge Your PDFs Into One
Now that you have all your image files saved as a PDF, you can start putting them together into one PDF file. You can continue on from Able2Extract. No need to exit the application. You can close off all but one of the tabs.
In that one tab you have left opened,
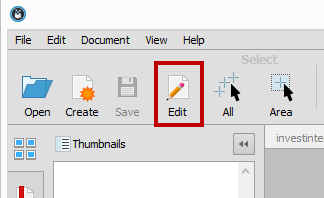
a) Click on the Edit icon from the toolbar. This is the file from which you will be creating your PDF portfolio. You can rename the file later on as needed; no need to worry about that just yet.
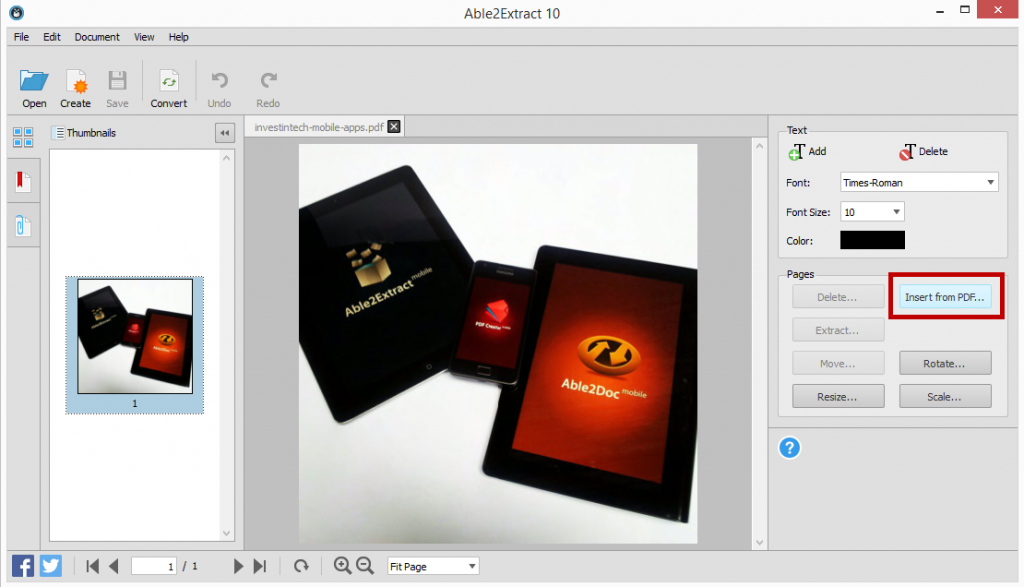
b) Click on the Insert from PDF… option in the Editing panel. One by one, you can add your newly created PDFs to the file by selecting it and clicking on Open.
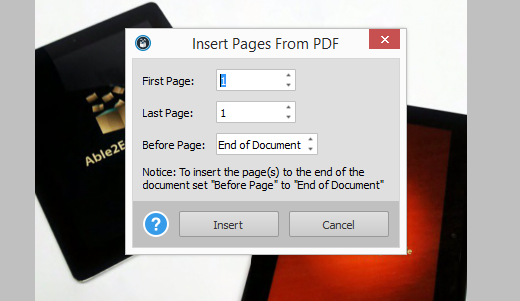
In the pop up dialog, leave the value in both page fields to 1 (it will be the first and last page you insert). You can decide the order of your images by using the Before Page field:
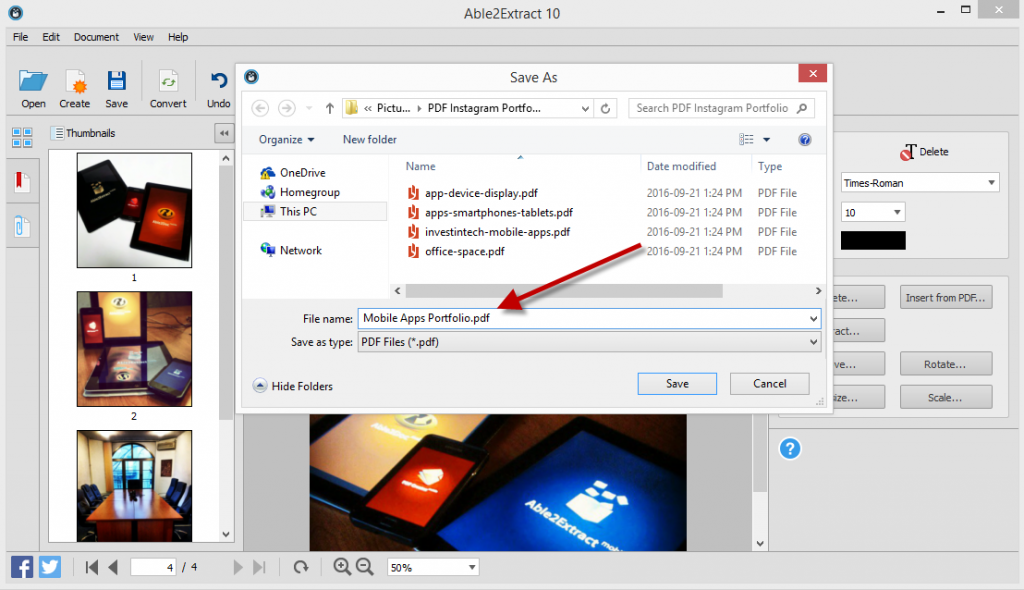
c) Once all your PDF photos are inserted, click on the Save icon once again. Or as mentioned above, you can rename the file by going to File > Save As… and renaming your file.
The final result? A professional looking PDF portfolio made from some of your best images:
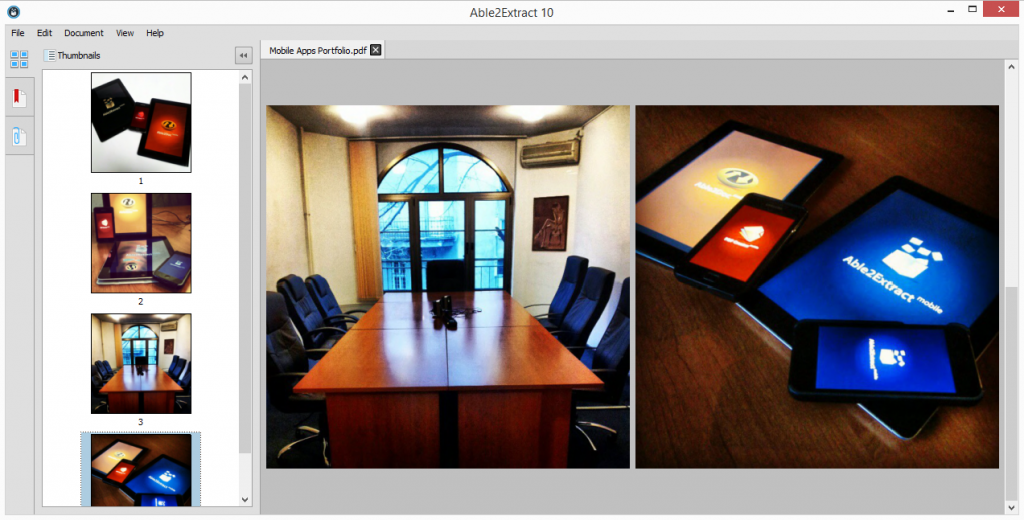
You can repeat the above steps in this third section to get other PDF content into the portfolio for a complete look. Add a title page, PDF pages with company information, a section on your services, testimonials from clients or even add a page with a list of publications that have featured your products.
How effective your portfolio becomes is up to you, so show off your best stuff!


