Creating PDFs with Able2Extract has always been a time saver. You simply open your file, add your security adjustments, and let the software do all the work. Even more convenient is the ability to use the Print functionality of the application you’re using to create those PDFs directly or to reprint already existing PDFs.
Well, what if we could make the process even easier than that?
Sure, the PDF creation feature makes turning your documents to PDFs easy with a single click, but if you need to create or reprint a number of PDFs, your job can easily grind to a halt.
With Able2Extract, we’ve got a nifty little shortcut for Windows 10 that does away with even opening the application to generate or reprint your PDF. That’s right. This tip lets you use the virtual printer and Windows Explorer to kick-start the process. All you need is a few settings in place.
We show you how to set it up step by step. Take a look!
How to Batch Print PDF Files Through Your Virtual Printer
Before we start, there are just a couple of things you should note about this shortcut:
- All the steps provided should be performed only once, except for the last one.
- Batch reprinting of PDFs (.pdf) will work exactly as described.
- Batch PDF creation will only work with multiple files of the same extension (eg. all .xlsx files). Selecting multiple files of different file extensions (eg. a combination of .xlsx, .docx, .pptx, etc.) won’t display the Print command needed in the context menu to make this shortcut work.
- These steps will only work for extensions that are recognized by Windows. It is easiest to recognize such files as those which have non-blank icons.
The first thing to do before going forward with the tutorial is to go into your Windows 10 Settings and ensure you have Able2Extract Professional 12.0 Printer as your default printer.
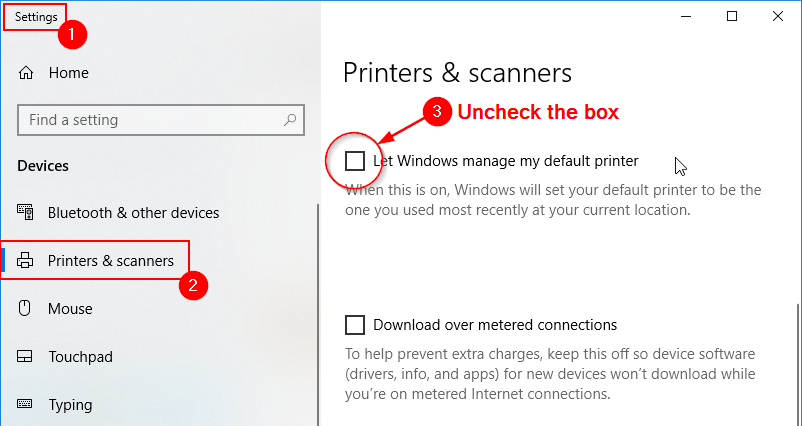
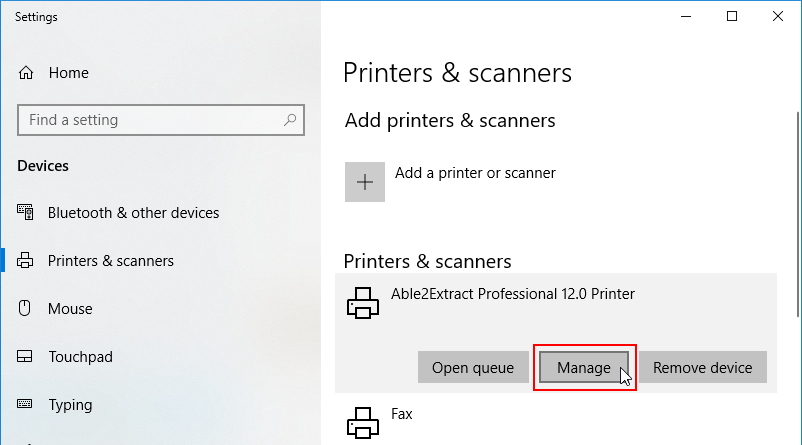
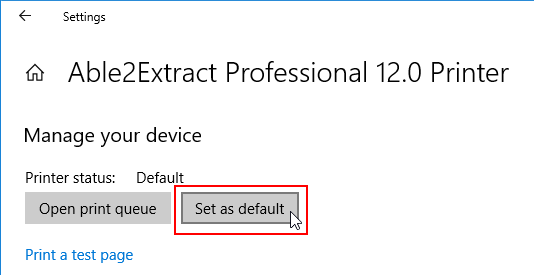
Once you have that all set, follow the steps below:
1. On the right side of your taskbar, expand the Taskbar Icons by clicking on the arrow button.
2. Right-click on the Able2Extract icon. Depending on the Able2Extract version you have, this can look a bit different than the one in the screenshot below:
![]()
- From the right-click context menu, select “Options…“.
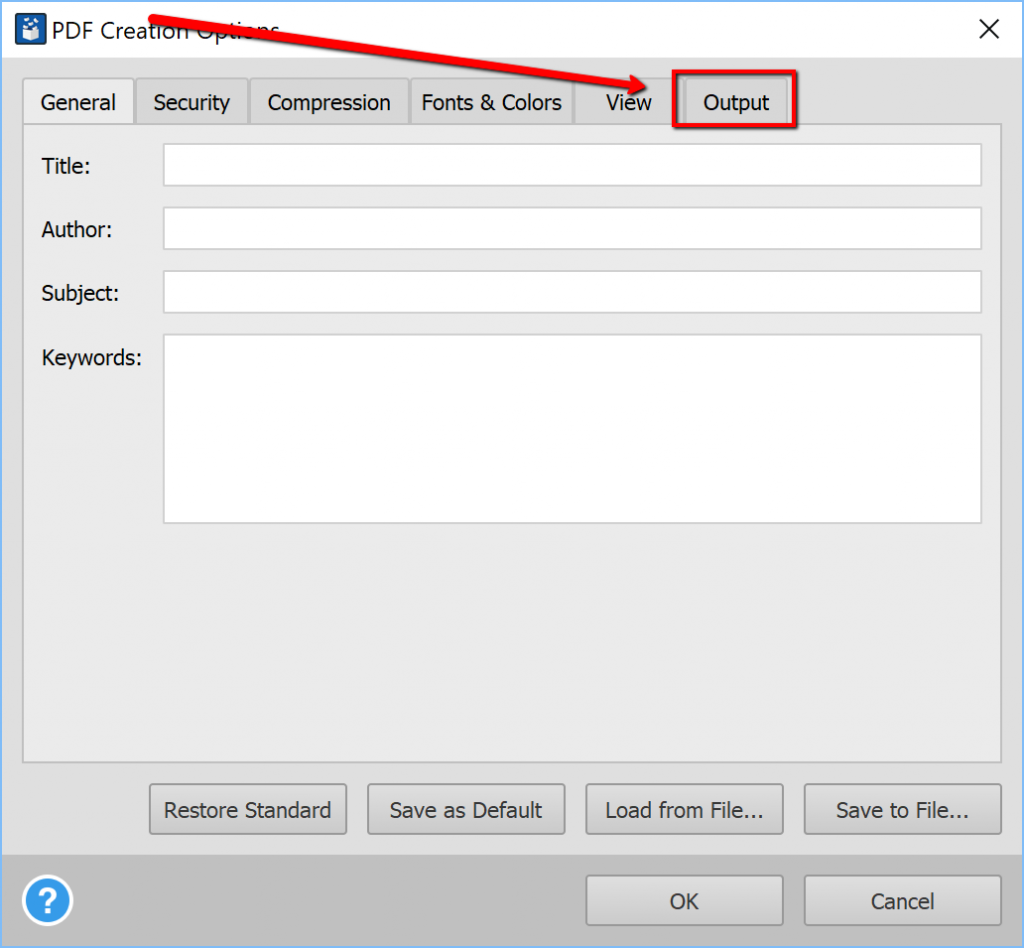
- In the PDF Creation Options dialog that appears, go to the “Output” Tab.
- In this section, you will need to set up the following options:
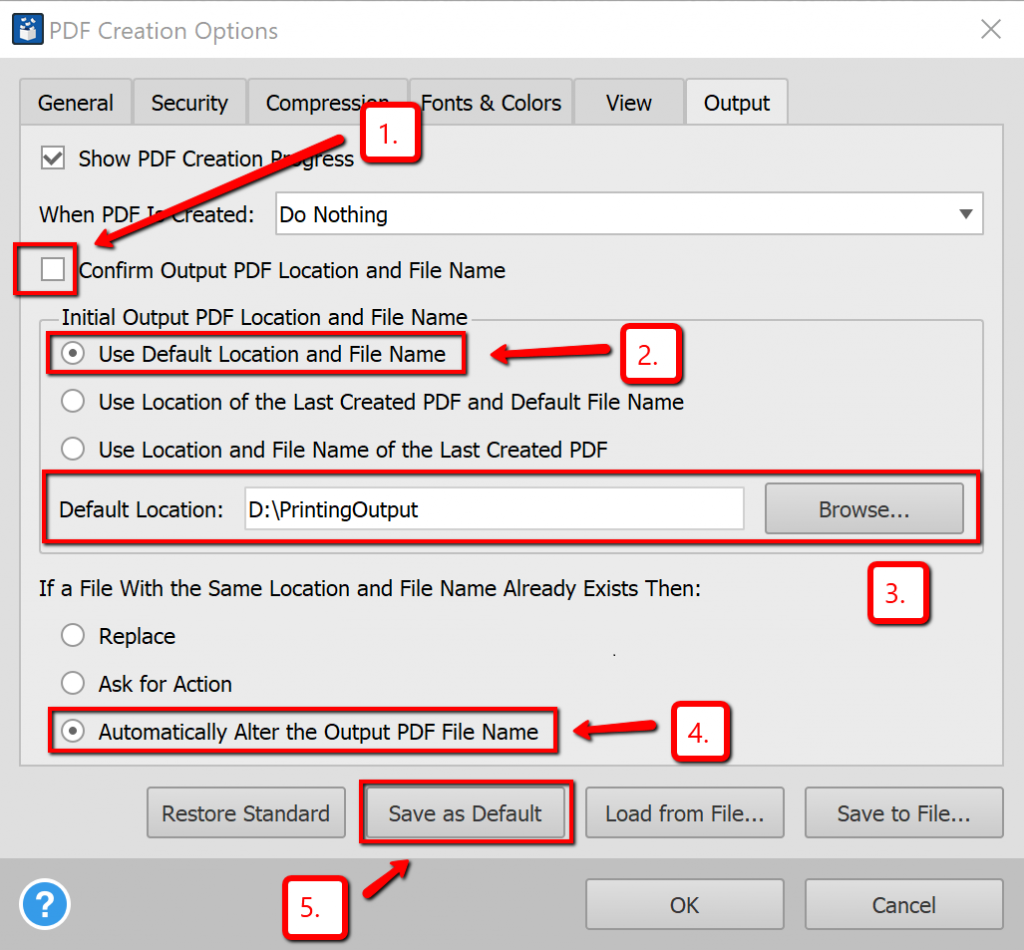
- Uncheck “Confirm Output PDF Location and File Name” (1)
- Select “Use Default Location and File Name” (2)
- Click on the “Browse…” button and navigate to the desired location of the Output folder for the re-printed files (3)
- Choose “Automatically Alter the Output PDF File Name” (4)
- Click on the “Save as Default” button (5)
6. Click on the OK button to close this dialog.
7. To batch create/reprint PDFs, simply select multiple files through Windows Explorer, right-click to bring up the context menu, and select “Print”.
Your new PDF files will be automatically re-printed to the “Default Location” you chose in step 5.
Download Able2Extract Professional 12 for free with a 7-day free trial to start creating and reprinting PDFs with a just a few clicks. If you have any other Able2Extract tips yourself, share them in the comments!


